
DIY Dog Projects to Save Your Yard
If you are feeling crafty or ready to put your handyman skills to work, consider some of these DIY dog projects.
There are many different DIY projects, but being in the pooper scooper business, there are some projects that we are more drawn to.
We’ve compiled some of our favorite DIY projects designed to help you deal with your dog’s messes.
We’re talking about poop.
Read on for instructions and links to sources for the best DIY dog projects to save your yard from piles of poop.
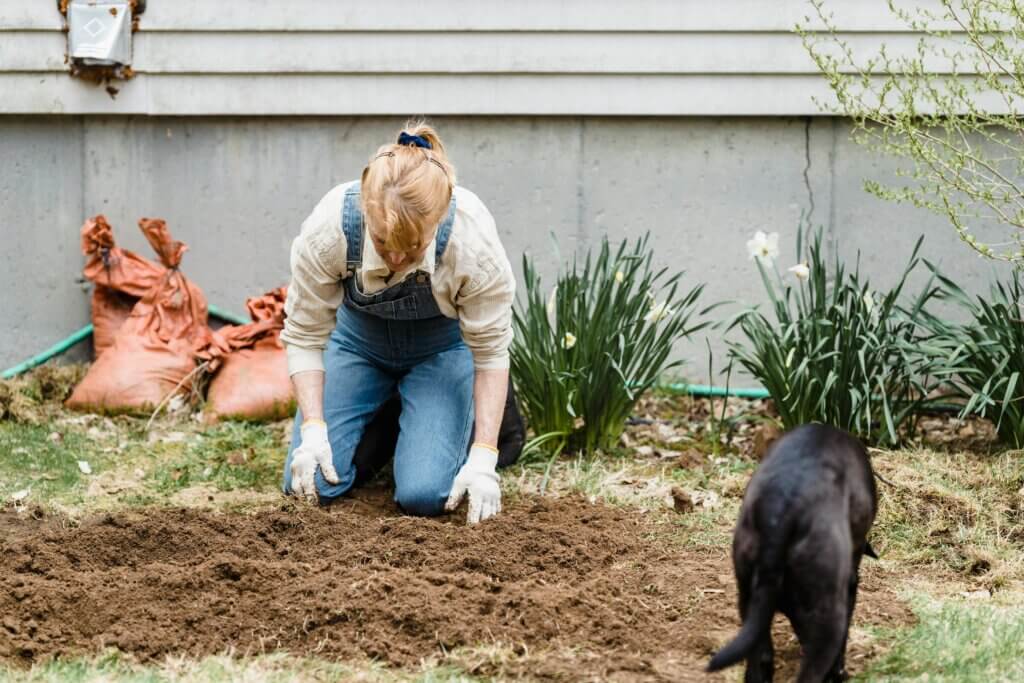
DIY Dog Potty Area
Here is a great guide for making a DIY dog potty area outside from Furs N Paws.
Supplies:
- Measuring tape
- Shovel
- Landscape fabric
- Edging material
- Pea gravel
- Rake
- Hose and spray nozzle
- Waste disposal bin
Instructions:
- Choose your location. Pick the perfect spot for your dog’s designated potty area. Prepare it by removing rocks, grass, weeds, sticks, and other debris from the area.
- Measure and mark. Use a measuring tape to determine the size of your desired potty yard based on your dog’s size and intended use. Once you have the ideal size, create an edging border to mark it out. Feel free to go for wood, plastic edging, paver stones, or a decorative material that complements your backyard’s overall landscaping. After edging the space, add a layer of weed-block landscaping fabric to prevent those unwanted weeds from messing with your dog’s bathroom.
- Drainage. For better drainage, start layering the area with one-inch soft rocks or sand as the base of your dog’s potty area.
- Add the filler. Calculate the exact amount of pea gravel you need for your upcoming potty area to avoid wastage. To figure out this, calculate the square footage of your potty area (length x width). Next, multiply the area by 0.25 (representing 3 inches of depth), and you have your desired volume. Pour your pea gravel onto the landscaping fabric and use a sturdy rake to distribute it evenly for a smooth surface. After setting up your drainage material, you’ll want to rinse the area with a hose pipe to remove loose dirt and help the gravel settle.
To see more details, recommendations, and photos, head to Furs N Paws.
DIY Poop Scooper
If you don’t like picking up hot poo in a little bag, you will love this DIY dog project.
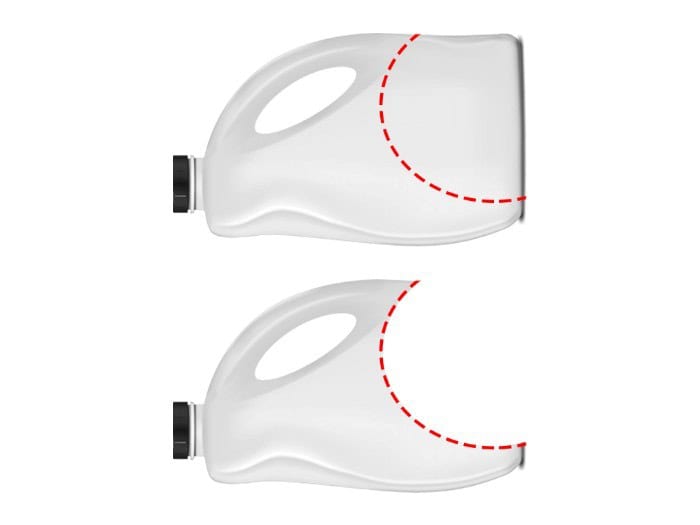
My Petsies has a simple DIY pooper scooper project.
Supplies:
- plastic laundry detergent bottles with lid
- a cutting blade (serrated knife, scissors, or carpet blade)
- a marking pen
- serrated knife, carpet blade, or heavy-duty scissors
Ingredients:
- Mark what you want to cut off. Start by marking your plastic laundry detergent bottle with a marker. Make sure to mark the area you want to cut with a circle so that you get a perfect scoop size.
- Cut your plastic laundry bottle. Using either a serrated knife, carpet blade, or heavy-duty scissors, start cutting the marked area in a circular motion. Make sure to hold onto the bottle securely while you do this, and be careful not to cut yourself!
- Sandpaper and smooth down the edges. Once you’ve cut your bottle, use a piece of sandpaper to smooth out any rough edges on the scooper. This will make it easier to hold and less likely to cause cuts or scrapes if it comes in contact with the skin.
- Customize your poop scooper (optional). You can also customize your scooper by painting it with bright colors or adding a fun pattern.
DIY Dog Poop Disposal System
Once you scoop the poop, where do you put it?
We love this DIY dog poop disposal system (aka a poop trashcan) from Mother Daughter Projects.
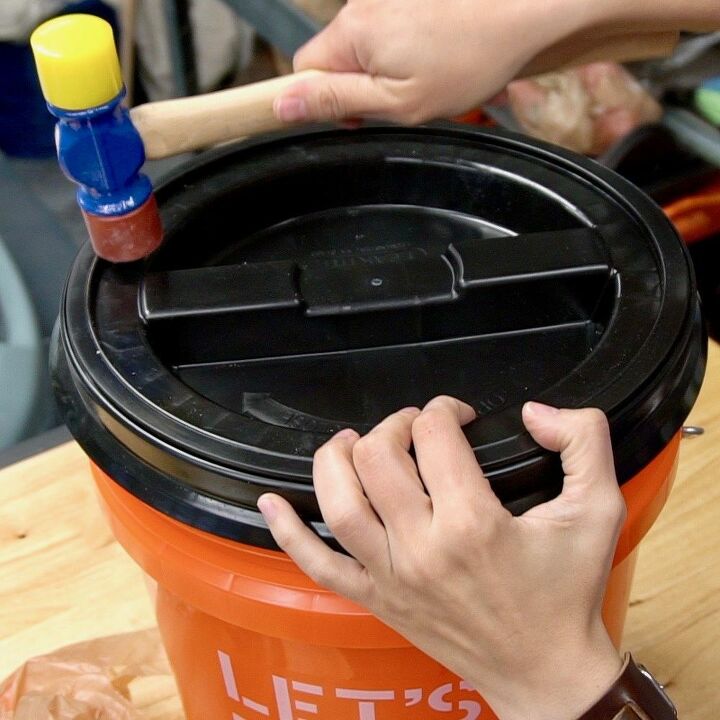
Supplies:
- 5-gallon bucket
- screw on lid for the bucket
- rubber mallet
- odor eliminators
- velcro sticker attachments (i.e. Command products)
- binder clips
- hot glue
- plastic bags or small trash bags
Instructions:
- Put a couple of the odor eliminators into the bottom of the bucket. Cut velcro to size and attach these to the underside of the lid.
- Use the rubber mallet to gently secure the lid to the top of the bucket. The lid is two pieces. The outer ring attaches to the bucket, and the center part screws on and off.
- Hot glue to secure two small binder clips opposite each other at the top of the bucket. These will hold the plastic bag (small trash bag) you fit into the bucket.
- Put the top in place and it’s ready to store filled waste bags until you’re ready to put it in the trash.
DIY Dog Poop Composter
Dog waste is bad for the environment and should never be left to just decompose in your yard.
Kinship has provided instructions for an environmentally friendly way to get rid of dog poop.
Supplies:
- poop
- can
Instructions:
-
Take an old plastic garbage can and drill about a dozen holes in the sides.
-
Cut out the bottom. (A keyhole saw works great for this.)
-
Dig a hole deep enough for the garbage can.
-
Toss some rocks or gravel in the hole for drainage and position the garbage can so it’s a little above ground level.
-
Place the lid on top. (You might want to paint something like “Dog Waste Composter” across the lid.)
-
Start scooping.
-
When you add poop to the bin, sprinkle in some septic starter (available at hardware stores or Amazon) and add some water.
Even Better Than DIY
While these DIY dog projects are a good way to deal with dog poop, there is a much more convenient way.
Sign up for regular poop scooping by Super Scoopers!
Super Scoopers will safely and effectively scoop the poop from your yard and dispose of it the right way.
Instead of buying DIY supplies and spending your time building, schedule your first poop scooping visit for FREE.